Wix to Shopify Migration: A Step-by-step Guide
Your online business wants to break free from limitations? If so, migrating from Wix to Shopify can be a smart move!
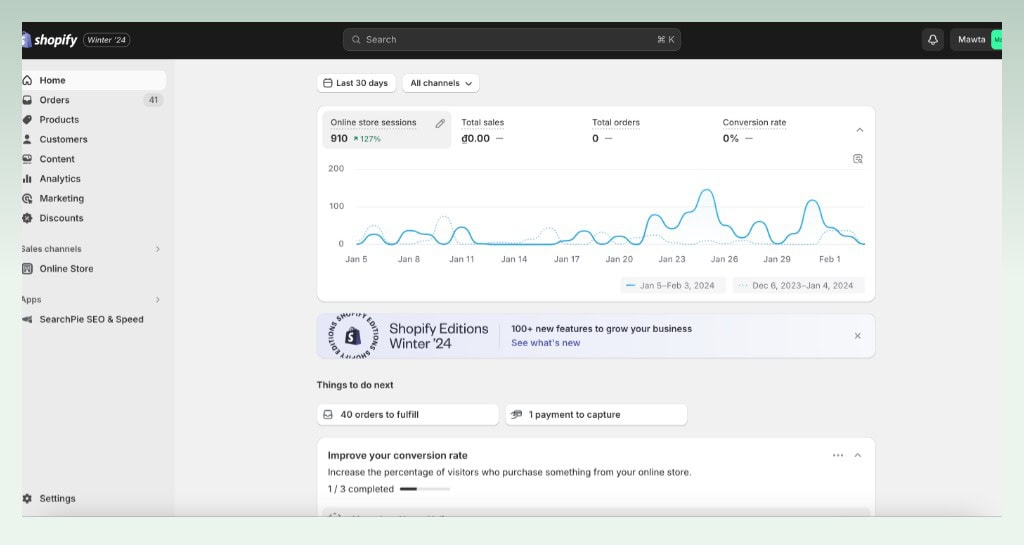
Shopify consistently stands out as a powerful and popular choice for businesses of all sizes. Therefore, there is no doubt that Wix to Shopify migration can unlock powerful features, greater flexibility, and enhanced growth potential.
If you are ready to take your online store to the next level, then keep reading and discover how to make your migration a smooth and successful transition.
1. What’s Wix to Shopify migration
Wix to Shopify migration refers to the process of moving your online store from the Wix platform to the Shopify platform. It can be broadly characterized by two main steps: transferring data and building a new website.

The first step involves transferring your products, customer data, orders, blog posts, and other important aspects of your store to Shopify. You can either export your data manually through Wix’s tools or use a third-party migration app that streamlines the process.
And then you will get started building your new Shopify store. You will be responsible for rearranging sections, adjusting content to fit new templates, and choosing elements like themes and apps that best represent your brand within Shopify’s framework.
And boom! Now your Shopify website is ready to launch and welcome its potential customers.

2. Why move from Wix to Shopify
2.1. Outstanding eCommerce features
While Wix offers general website-building tools with eCommerce capabilities, Shopify is built from the ground up for creating and managing online stores. This means it offers a wider range of features and functionalities specifically tailored to eCommerce needs, such as:
- Advanced product management tools (inventory tracking, variants, bundles)
- Secure payment gateways and fraud prevention
- Powerful shipping and tax management
- Built-in marketing and promotional tools
- Abandoned cart recovery
- Multi-channel selling capabilities (e.g., social media, marketplaces)
2.2. Scalability and growth
Whether you’re a small startup or a large enterprise, Shopify has the tools and resources to support your growth.
In addition, Shopify can handle high-volume traffic and transactions, ensuring your store remains reliable and scalable as your business grows.
2.3. SEO and marketing
When comparing Wix vs Shopify, it can be seen that Shopify offers various tools and functionalities to optimize your store for search engines, giving you a potential edge in organic traffic acquisition.

Besides, Shopify seamlessly integrates with popular marketing platforms and tools, making it easier to manage your marketing campaigns and reach your target audience.
2.4. Security and reliability
Shopify is Level 1 PCI DSS compliant, providing a higher level of security for online transactions compared to Wix. This is crucial for businesses handling sensitive customer data.
Another important factor is that Shopify offers enterprise-grade features like API access, custom app development, and priority support. It especially caters to large businesses with complex needs.
3. Wix to Shopify migration checklist
3.1. Preparation
- Evaluate your needs
- Research Shopify
- Backup your Wix data
- Choose a migration method
- Set up your Shopify store
- Prepare your theme and branding
3.2. Data migration
- Transfer your products
- Migrate customer data
- Transfer orders
- Move blog posts and content
3.3. Website building & optimization
- Customize theme
- Research and integrate apps
- Set up payment gateways
- Set up shipping and tax
- Test and preview
3.4. Launch & post-migration
- Set up the Shopify domain
- Announce the launch
- Do SEO optimization
- Monitor and analyze
4. How much does it cost to migrate from Wix to Shopify?
Is Wix to Shopify migration free? Let’s go into detail about how much you need to invest in this process!
4.1. Migration method
- Manual migration: This is free but time-consuming and requires technical knowledge. It might only involve some basic tools like domain transfer fees, costing around $50.
- Third-party apps: These apps offer automated migration with varying costs depending on features and data complexity. Prices typically range from $50 to $500. Popular options include Migrate Guru, Cart2Cart, and LitExtension.
- Shopify experts: These professionals offer personalized assistance and handle complex migrations. Hourly rates can range from $50 to $300+, with the total cost depending on the project scope.

It is essential to take a small note that smaller stores with fewer products, customers, and orders will be easier and cheaper to migrate.
However, stores with extensive data, intricate product variations, and large customer bases will require more work and incur higher costs.
4.2. Additional services
- Shopify plan: Shopify plans can range in price from $29 to $299 per month.
- Theme cost: Shopify provides both free and paid themes with a price range from $0 – $300+.
- Additional development: Creating custom functionalities, integrations, or unique UI/UX elements not offered by the theme.
- App integrations: Additional app fees might apply for specific functionalities you need.
- Domain transfer: Costs vary based on the domain registrar and renewal fees.
Based on these detailed insights, we can see that it’s crucial to research your specific needs by analyzing your store’s size, data complexity, and desired migration level.
In addition, don’t forget to compare quotes from different providers to find the best fit for your budget and requirements.
5. What data can you migrate from Wix to Shopify
When migrating from Wix to Shopify, you can transfer a variety of data types, including:
Products
- Product titles and descriptions
- Images and videos
- Variants (e.g., sizes, colors)
- Inventory levels and SKUs
- Prices
- Categories and tags
- SEO meta descriptions
Customers
- Customer names and contact information (email, phone)
- Billing and shipping addresses
- Order history
- Customer notes
Orders
- Order details (items, quantities, prices)
- Order status (pending, fulfilled, canceled)
- Shipping information
- Payment information (excluding sensitive data)
Website content
- Blog posts and pages
- Static pages (e.g., About Us, Contact)
- Images and other media
Additional data
- Shipping settings and rates
- Taxes
- Payment gateway settings (excluding sensitive data)
6. What you cannot migrate directly from Wix to Shopify
While migrating from Wix to Shopify allows transferring a substantial amount of data, there are certain limitations to direct migration. Here’s what you cannot directly migrate:
Sensitive data
- Financial information (Full credit card numbers, bank account details, etc.)
- Customer passwords
Coupons and promotions
- Existing discount codes and promotions
- Gift cards and store credit
Platform-specific features
- Data and setup of Wix apps
- Wix design elements
- Wix Analytics data
- Highly customized product options and variants
- Blog post formatting
- SEO rankings
7. How to migrate from Wix to Shopify
7.1. Step 1: Export Wix data
Let’s follow these steps to export products from Wix to Shopify!
Products
- Use Wix’s export tool to download a CSV file containing product titles, descriptions, images, variants, inventory levels, and prices.
- Ensure the CSV file follows Shopify’s import format requirements for a smooth transfer.
- You can export product images separately and link them manually after import.
Customers
- Download a CSV file containing customer names, emails, addresses, and order history (with their consent).
- Be mindful of data privacy regulations and anonymize sensitive information if needed.

Orders
- Export a CSV file with order numbers, product details, quantities, prices, shipping information, and fulfillment status.
Content
- Export blog posts, pages, and images as separate files or compressed formats.
- Pay attention to formatting and adapt it to Shopify’s theme requirements for optimal presentation.
7.2. Step 2: Set up your Shopify account
- Sign up for a new Shopify account.
- Choose a suitable Shopify plan based on your store’s size and needs.
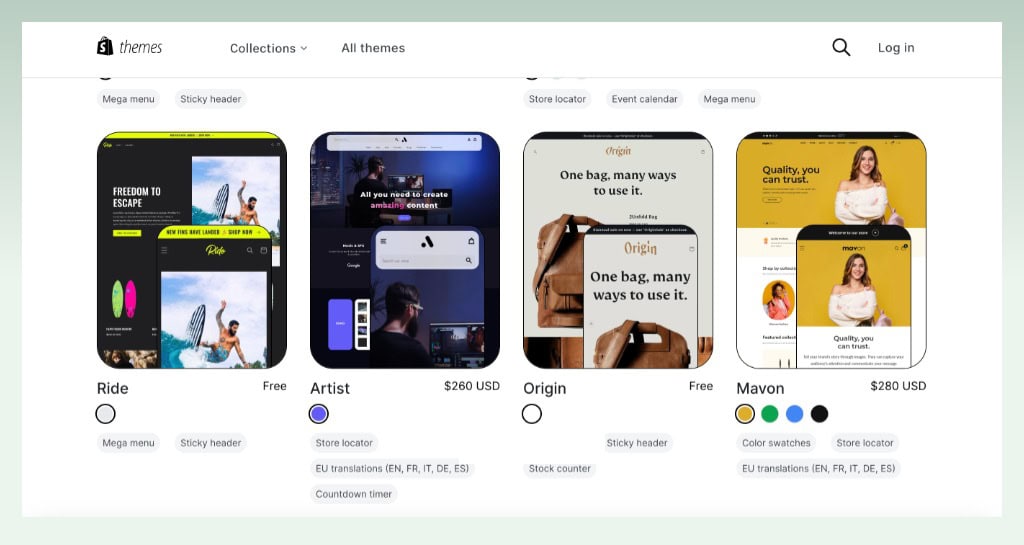
- Explore the available Shopify themes and find one that aligns with your brand identity and desired functionality.
- Use the theme editor to customize colors, fonts, layouts, and design elements to personalize your store.

7.3. Step 3: Import your data to Shopify
Your Shopify website is ready, so now, let’s check on how to import products from Wix to Shopify.
Method 1: Manual migration
- Go to Products > Import > Add file in your Shopify admin.
- Select your CSV file.
- Choose your options and click Upload and continue.
- Review the details, then click Import products.
You can apply the same process for customer lists, orders, etc. to migrate from Wix to Shopify.

Method 2: Third-party migration app
- Choose your preferred app and install it in your Shopify admin.

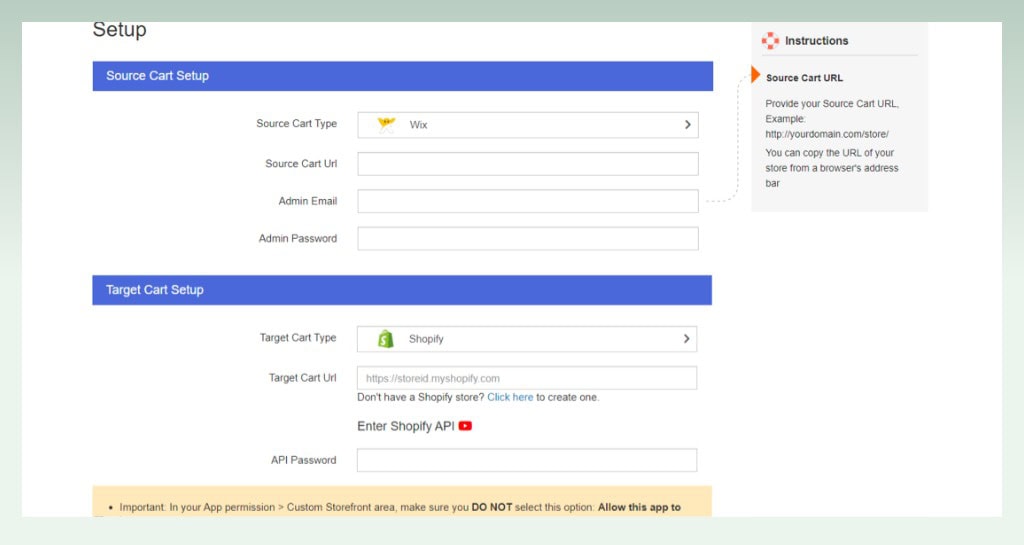
- Connect your Wix store and Shopify account.
- Define the data you want to migrate (products, customers, orders, etc.).
- Map data fields between Wix and Shopify.
- Set preferences and additional options.

- Begin the migration process within the app once everything is configured.
- Track the migration status and address any reported issues or errors.
Method 3: Professional service
In addition, you can hire a professional service or expert for your Wix to Shopify migration.
While professional services are more expensive than DIY or app-based methods, they offer unmatched expertise and reduce overall risks.
When choosing a professional, you should prioritize experience, clear communication, and a portfolio showcasing similar migrations. Also, don’t forget to clearly define your project scope and budget expectations upfront.
7.4. Step 4: Set up payment gateways
- Go to Shopify’s Settings > Payments section.
- Choose a secure payment gateway like Shopify Payments, Stripe, or PayPal.
- Follow the chosen gateway’s instructions to connect your account and configure settings.
- Activate the payment gateway in your Shopify store to accept customer payments.
- Test transactions thoroughly to ensure everything works smoothly.

7.5. Step 5: Set up shipping
Review your store address:
- Update your store address in Shopify Settings > General to ensure accurate shipping rates based on your location.
- If you ship from multiple locations, add them as Locations in Settings > Shipping and delivery.

Create shipping zones
- Define regions you ship to by creating zones in Settings > Shipping and delivery > Shipping zones.
- Group locations with similar shipping costs into zones (e.g., domestic, international).
Configure shipment dimensions (optional)
- If using carrier-calculated rates, specify average package dimensions (height, weight, depth) in Settings > Shipping and delivery > Shipping profiles.
- Carriers use volumetric weight for pricing, so accurate dimensions are crucial.
Set up shipping rates
- For each zone, set up rates in Settings > Shipping and delivery > Shipping profiles.
- Choose methods like flat rates, weight-based rates, or carrier-calculated rates.
- Factor in packaging, handling, and insurance costs when setting rates.
Pick a shipping strategy
- Decide how you’ll fulfill orders: ship yourself, use a fulfillment service, or offer in-store pickup.
- Consider options like free shipping thresholds, local delivery, or click-and-collect.
Explore fulfillment services (optional)
- If outsourcing fulfillment, research services in the Shopify App Store.
- Compare pricing, features, and delivery times to find the best fit for your needs.
7.6. Step 6: Configure your taxes
Charge taxes based on shipping destinations
- Enable “Shipping taxes” in Settings > Shipping and delivery to automatically calculate taxes based on customer location.
- Shopify handles this automatically based on regional regulations.

Use tax overrides (optional)
- Manually adjust taxes for specific regions or products in Settings > Taxes > Tax overrides.
- Use this if you have unique tax situations not covered by automatic calculations.
7.7. Step 7: Test and preview
- Thoroughly test your store across different devices and browsers before launch.
- Check all functionalities, product pages, checkout processes, payment gateways, and mobile responsiveness.
- Use Shopify’s Preview Mode to see your store from a customer’s perspective.
- Fix any bugs or errors you encounter before going live.
7.8. Step 8: Set up a Shopify domain
You don’t know how to transfer a domain from Wix to Shopify?
If you plan to use your existing domain name, you can transfer it from your current registrar to Shopify.
- Unlock your domain on Wix
- Get the transfer authorization code
- Go to Settings > Domains in your Shopify admin
- Click Transfer domain and enter your domain

- Enter the authorization code and click Verify domain
Alternatively, you can purchase a new domain name directly through Shopify also. Just buy it, connect your chosen domain to your Shopify store, and configure DNS settings.
And congratulations! Your Shopify store is ready to launch now!
8. Tips for smooth migration
8.1. Data accuracy and completeness
You need to double-check titles, descriptions, images, variants, inventory levels, and prices for accuracy and completeness. Missing or inaccurate data can disrupt your store’s operations and frustrate customers.
8.2. Payment gateways
Make sure that payment gateways like Shopify Payments, Stripe, or PayPal are configured correctly to ensure smooth transactions and customer checkout experiences. Incorrect configurations can lead to payment failures and lost sales.
8.3. Thorough testing
Test all aspects of your new store, including product pages, checkout process, payment gateways, and mobile responsiveness, before launch. Fix any bugs or issues to avoid a negative first impression on customers.
8.4. Legal and tax implications
It is an important task to review Shopify’s terms of service and user agreements carefully to ensure they align with your business practices and legal requirements.
Also, make sure that you understand and comply with relevant data privacy regulations (e.g., GDPR, CCPA) when transferring customer data and using third-party apps.
9. Some errors and solutions
| Errors | Solution |
| The import was successful, but data changed | Products missing required variant options (like size or color) won’t be imported. Consider adding these products manually instead. |
| Products were imported successfully, but not published | Imported products marked as “hidden” won’t go live until you make them available in your sales channels. Go to your product list and activate them for the desired channels. |
| Details of imported products are missed | Some descriptions might be incomplete after import. Review and fill in missing information directly on the product page. |
| Product variants failed to import | The import was successful, but the data changed |
10. Wrap up
This article offers a detailed guide on moving your website from Wix to Shopify. It covers backing up your Wix data, transferring your domain, and dealing with common migration problems. By following these steps, you can smoothly switch your online store to Shopify and maintain a seamless online presence.
And don’t forget to follow eComStart to get more valuable insights into this eCommerce world!
