
How to Change product template in Shopify: A-Z tutorial!

If you’re here searching for how to change product template in Shopify, you probably want to have a unique product page that demonstrates your items. You’re in the right spot! This guide is here to walk you through everything – from creating a product template to assigning it to one item or a whole squad of products.
Before we dive in, if you’re just starting and want a budget-friendly entry into eCommerce, check out Shopify 1 dollar. Cheap, easy, and quick!
1. An overview of the Product template
1.1. What is a product template?
A product template in Shopify is like a blueprint for how your product pages look. It controls how your product information is displayed, where the name, pics, price, shipping information, or “Buy Now” button shows up.
Every Shopify theme has its default product template. They are pre-designed layouts. However, creating multiple templates and assigning each of them to several products is also very easy.
1.2. When do you need to change a product template?
It is key to know how to create a new product template in Shopify and when to use it. Here are a few moments when your product page deserves a new vibe.
- Highlighting features, seasonal campaigns: You have a unique product with must-see features or a limited edition. Therefore, a special template can help you put it front and center with dedicated sections for videos or customer testimonials.
- Different product types need different looks: An earphone page shouldn’t look like a luxury dress online. So customize your template with size charts and fabric details for apparel, and another with tech specs and warranty information for gadgets.
- A/B Testing: Creating a new template lets you test without messing up your whole store. Trying two layouts can help you determine what will boost your conversion rate.
- Improving User Experience: Experimenting with new templates can significantly improve the online shopping experience for your customers.
2. How to change product template in Shopify
This guide assumes that you already have your Shopify store built and ready all the way! If you haven’t opened an actual store yet, check out How to launch a Shopify store tutorial for extra information.
2.1. How to create a product template in Shopify
You need to create a new product template in Shopify from scratch before you can switch to a new template. Follow these steps:
Step 1: Shopify Admin > Online Store > Customize
Log in to your Shopify account and go to the admin, click “Online Store” on the left sidebar. Then, you will be navigated to the “Themes” tab, then hit “Customize” on your live theme.

Step 2: Click “Home Page” on top bar to pick a page
Look at the top navigation bar – it says “Home Page” by default. Click it to expand a list of choices, then choose “Products”.

Step 3: Pick or add a template
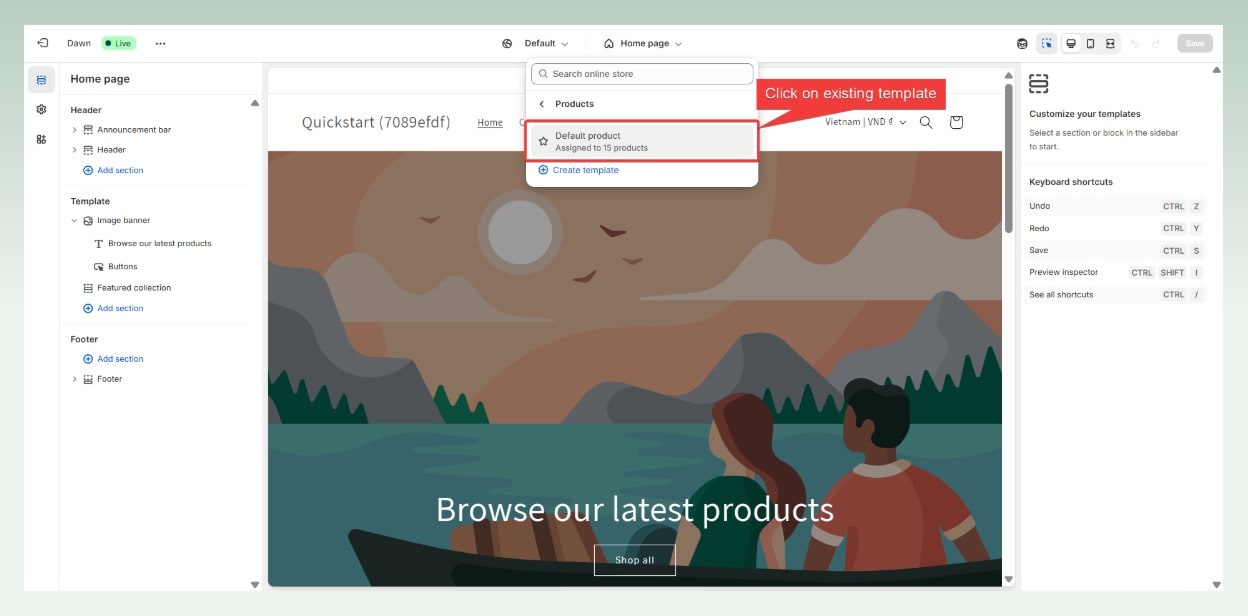
After you click on “Products,” there are 2 options:
- (1): Select an existing template to edit,
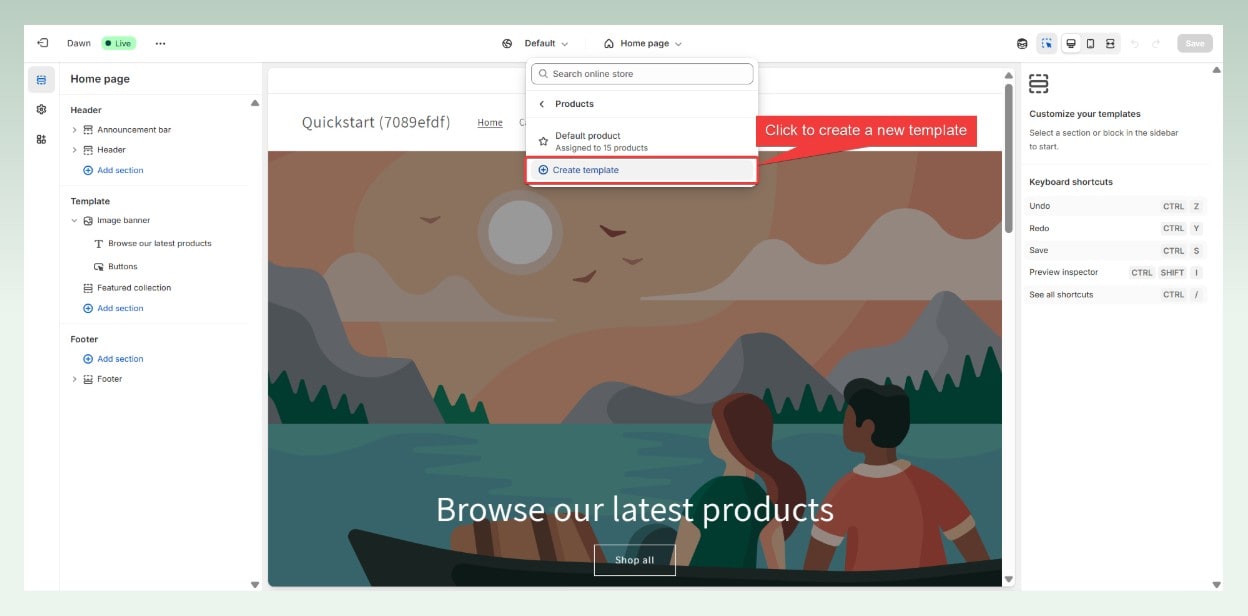
- (2): Or click “+ Create template” to start fresh. Give your new template a name like with-reviews or black-friday.
👉🏻 Option 1: Select an existing template
👉🏻 Option 2: Add a new template

Step 4: Drag and drop to customize
Use Shopify’s drag-and-drop sections to move stuff around. This is how to change product page layout in Shopify:
- On the left-hand sidebar, you’ll see options to “Add section.” You can add sections for product images, descriptions, variants, related products, customer reviews, and tons more!
- On the right-side bar, you can customize the text, images, and positions of every section using the settings panel.

Step 5: Click save
Happy with your masterpiece? Don’t forget to click “Save” when you’re done!

‼️However, many merchants create beautiful new product templates but then scratch their heads, wondering why they don’t see them in their store. Don’t panic, it is because the new template hasn’t been assigned to products.
Let’s fix that next by learning how to change product template in a specific product!
2.2. How to change product template in Shopify (for a product)
Now that you’ve made your shiny new layout. Here’s how to change product template in Shopify for just one item:
Step 1: Shopify Admin > Products > Pick a Product
In your Shopify admin panel, head to the “Products” tab, then click the product you want to give the new template.

Step 2: Scroll to “Theme template”
Scroll down the product page until you see the “Theme template” section on the right.

Step 3: Choose your template
Click the dropdown menu within the “Theme template” section. You’ll see a list of all the product templates available in your theme, including the one you just created. Pick the new template you want to use from the list.

💡Important note: If you don’t see your newly created template, it might be because you didn’t create it in the Live theme. Go back to 2.1. How to create a product template in Shopify part and take the steps again in your current Live theme.
Step 4: Click Save
Don’t forget to click the “Save” button in the top right corner of the product details page to apply the new template.

2.3. How to change Product Template in Shopify (in bulk)?
Every Shopify store has many products, and as the store owners, we don’t always have time to edit them one by one. Therefore, let’s explore how to assign product template in Shopify for a bunch of products speedily:
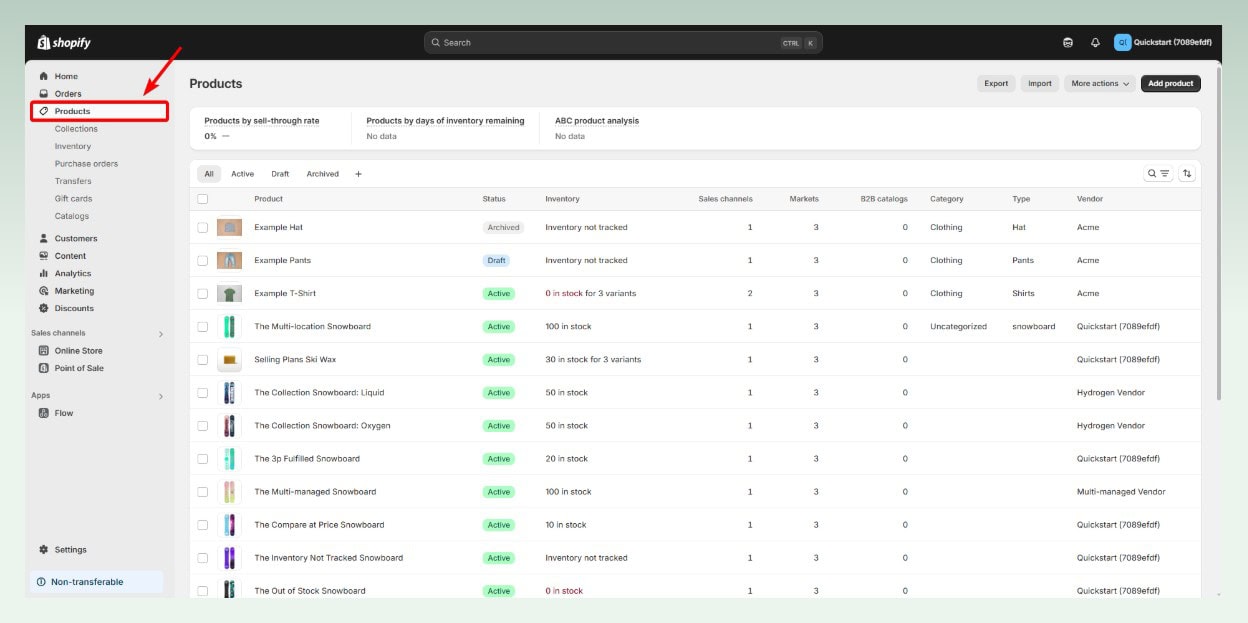
Step 1: Shopify Admin > Products tab
In your Shopify admin panel, go to “Products,” and you will see your list of products.
Step 2: Select products to edit
Now you need to select which products you want to edit:
- To choose specific products: Tick the boxes next to the product’s name.

- To choose all products: Want them all? Check the box at the very top of the list!

Step 3: Click bulk edit
Once you have selected it, hit the “Bulk edit” button on the top right.

Step 4: Add “Template” column
You’ll now be taken to the bulk editor.
By default, you might not see the “Template” column. So, click “Columns” > tick “Template” to show that column. You can also untick several checkboxes to hide unnecessary columns.

Step 5: Pick your template
In the “Template” column, you’ll see the current template assigned to your selected products. Click “Product” (or the current template name), then choose your new template from the dropdown.
To quickly change, hold the small blue square on the bottom right and drag down. Or, you can copy the value and paste it into your desired row.

Step 6: Click Save
Click the “Save” button, and Shopify will update the product templates for all the products you selected.

3. Conclusion
Learning how to change product templates in Shopify is an essential process for any Shopify store owner looking to elevate their online shopping experience and improve their conversion rate. And now, with this throughout guide, changing the template is a piece of cake! Don’t be afraid to experiment with different layouts until you find the one that makes your customers click “Add to Cart” fast!
For more eCommerce knowledge to launch a successful Shopify store, don’t forget to swing by eComStart! We’ve got all the tips and tricks to make your online shopping game unbeatable.

